Categories
Disney Food Disney Parks Disney Recipes Other

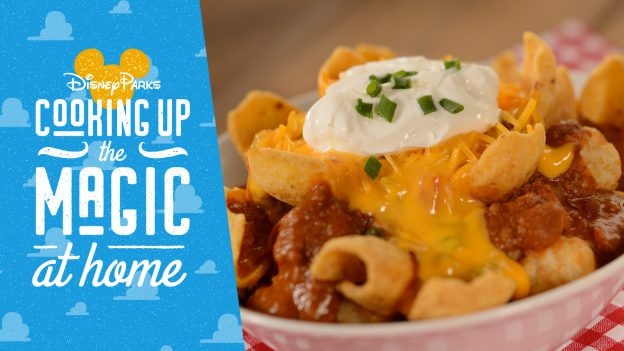
#DisneyMagicMoments: Cooking Up the Magic — First Time on Disney Parks Blog – Recipe for Totchos from Woody’s Lunch Box at Disney’s Hollywood Studios – YEEHAW!

#DisneyMagicMoments: Cooking Up the Magic — First Time on Disney Parks Blog – Recipe for Totchos from Woody’s Lunch Box at Disney’s Hollywood Studios – YEEHAW!

My partner in all things Disney food, Alex Dunlap, recently shared the delicious Grilled Three-Cheese  Sandwich recipe from Woody’s Lunch Box at Disney’s Hollywood Studios. Guess what else Woody packed in his lunch box that’s easy to make at home? Potato barrels coated with
beef and bean chili, gooey queso sauce, and crunchy corn chips finished with sour cream and a sprinkle of green onions – Yep, TOTCHOS!

Super simple and highly recommended to make for watching “Toy Story” on Disney+. If feeling the need for even more cheese, how about making Grilled Three-Cheese Sandwiches AND Totchos for a Toy Story marathon? Sounds perfect to me!
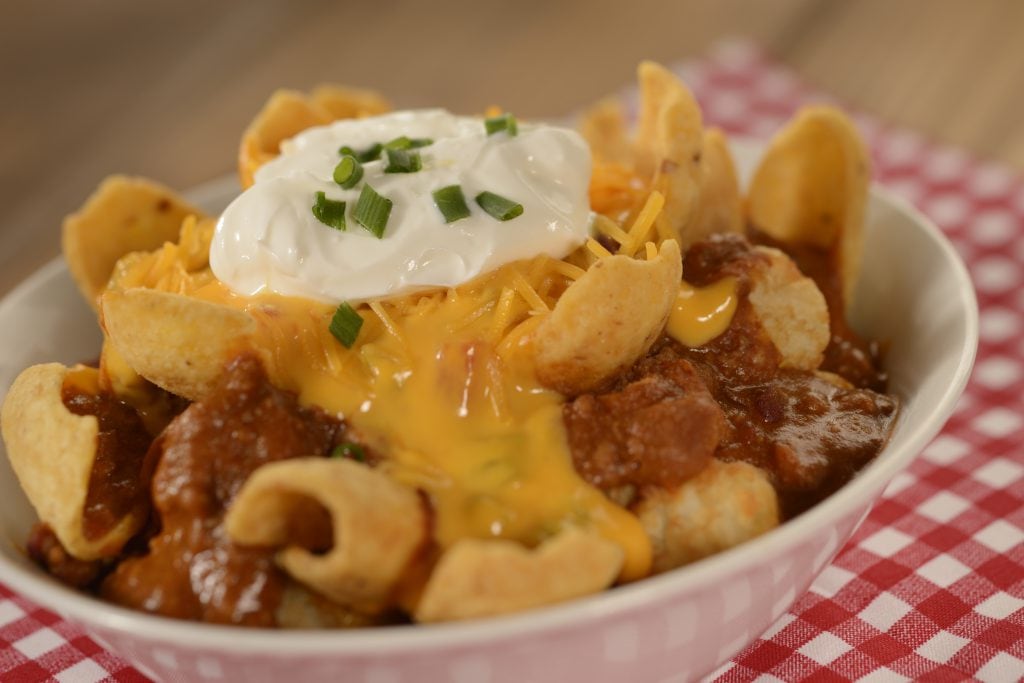
Totchos from Woody’s Lunch Box at Disney’s Hollywood Studios

Totchos from Woody’s Lunch Box at Disney’s Hollywood Studios

Serves 6

Chili with Beans

  • 1 pound lean ground beef
  • 1 medium yellow onion, finely chopped
  • 3 cloves garlic, minced
  • 1 (14.5 ounce) can crushed tomatoes
  • 1 (15 ounce) can tomato sauce
  • 1 (15 ounce) can kidney beans, drained
  • 2 tablespoons chili powder
  • 1 tablespoon ground cumin
  • 1 tablespoon coarse salt
  • Black pepper, to taste
  • Ground cayenne, to taste

Queso Sauce

  • 2 cups jar cheese sauce
  • 1 (10 ounce) can diced tomatoes with chilies

Totchos

  • 1 (2 pound) bag frozen potato
    barrels
  • 1 1/2 cups corn chips
  • Chili with Beans
  • Queso Sauce
  • 3/4 cup shredded cheddar cheese
  • 6 tablespoons sour cream
  • 2 tablespoons thinly sliced green onions

For Chili with Beans:

  1. Brown ground beef in a 5-6
    quart Dutch oven over medium heat until fully cooked. Drain off excess grease.
  2. Add onion and garlic and
    sauté for 5-7 minutes, until onion is translucent.
  3. Add crushed tomatoes, tomato
    sauce, kidney beans, chili powder, and cumin. Simmer for 20 minutes. Add salt.
  4. Add black pepper and
    cayenne, as needed.
  5. Keep warm until ready to
    serve.

For Queso Sauce:

  1. Place cheese sauce and diced
    tomatoes with chilies in small saucepan. Cook over low heat for 10 minutes,
    until warm.
  2. Keep warm until ready to
    serve.

For Totchos:

  1. Cook potato barrels
    according to package instructions.
  2. Divide potato barrels into 6
    bowls. Place 1/4 cup each of corn chips, chili with beans, and queso sauce on
    top of each bowl of potato barrels.
  3. Top each bowl with 2
    tablespoons shredded cheese, 1 tablespoon sour cream, and 1 teaspoon green
    onions.

Note: This recipe has been converted from a
larger quantity in the restaurant kitchens. The flavor profile may vary from
the restaurant’s version. As a reminder while preparing this recipe, please
supervise children who are helping or nearby.

Click here for a print-at-home version of this recipe!

Ava, a 13-year-old junior chef and daughter of Disney
photographer Matt Stroshane, made this recipe in her home kitchen with the help
of her personal sous chefs (mom and dad) and official taste tester (her
11-year-old brother, Adam). Check out Ava’s video below.

Stay connected with Disney
Parks Blog
 for more delicious
Disney recipes and be sure to share the magic with other Disney fans using the
hashtag #DisneyMagicMoments. Happy cooking!

From our friends at disneyparks.disney.go.com
Filed Under: Disney Dining, Disney’s Hollywood Studios, Walt Disney World Resort

Categories
Disney Food Disney Parks Disney Recipes

Hummingbird Cake from Chef Art Smith’s Homecomin in Disney Springs!

Chef Art Smith’s Homecomin’ at Disney Springs serves up farm-to-fork comfort food and craft cocktails and is easily a guest favorite. One of the best menu items is the famous Hummingbird Cake. The Hummingbird cake is a pineapple-banana cake with cream cheese frosting from and served with a seasonal fruit gastrique and a scoop of vanilla bean ice cream.

You can now enjoy this delicious cake at home! Share with your family or keep it all to yourself.

Cake:

  • 3 cups all purpose flour
  • 2 cups granulated sugar
  • 1 teaspoon baking soda
  • 1 teaspoon cinnamon
  • 1/2 teaspoon salt
  • 2 cups chopped ripe bananas
  • 1 cup drained crushed pineapple
  • 1 cup vegetable oil
  • 2 large eggs, beaten
  • 1 1/2 teaspoons vanilla extract
  • 4 ounces finely chopped pecans (optional)

Frosting:

  • 8 ounces cream cheese at room temperature
  • 1/2 cup butter at room temperature
  • 1 pound confectioners sugar
  • 1 teaspoon vanilla extract

Directions:

  1. Position oven racks in the center and bottom third of the oven and preheat to 350 degrees. Lightly butter two 9-inch round cake pans. Sprinkle evenly with flour and tap out excess.
  2. Sift the flour, sugar, baking soda, cinnamon and salt into a bowl. In another bowl, stir or whisk the bananas, pineapple, oil, eggs and vanilla until combined. Do not use an electric mixer. Pout into the dry mixture and fold together with a large spatula until smooth. Do not beat. Fold in the pecans. Spread evenly into the pans.
  3. Bake until the cake springs back when pressed in the center, 30 to 35 minutes. Transfer the cakes to wire racks to cool for 10 minutes. Invert the cakes onto the racks. Turn right side up and cool completely.
  4. Using an electric mixer on high speed, beat the cream cheese and butter in a large bowl until combined. On low speed, gradually beat in the sugar, then the vanilla to make a smooth icing. Place one cake layer upside down on a serving platter. Spread with about 2/3 cup of the icing. Top with the second layer right side up. Spread the remaining icing over the top and sides of the cake.
  5. The cake can be prepared up to one day ahead and stored uncovered in the refrigerator. Let stand at room temperature one hour before serving.

Let us know how your Hummingbird Cake turns out!

Recipe

From our friends at chipandco.com
Filed Under: Disney Food, Disney Snacks & Treats, Disney Springs, Other Disney Stuff, Chef Art Smith’s Homecomin, Disney Recipes, Hummingbird Cake

Categories
Disney Food Disney Movies Disney Recipes Other

Try this at home Sleeping beauty donut cake

Sleeping Beauty donut cake

I know you, I walked with you once upon a dream.

For some of us, eating a donut cake does sound like a dream come true! If you watched the animated Sleeping Beauty film, then you will recall the lopsided cake the three fairy godmothers baked for Aurora. Today, we’ll show you how to bake your own Sleeping Beauty Donut Cake at home.

Ingredients

  • Donuts (store-bought or homemade)
  • White candy melts
  • 2 Cups powdered sugar
  • 2 1/2 Tbsps milk
  • Dash of vanilla extract
  • Blue and yellow gel food coloring
  • Vanilla frosting
  • Long pretzels logs
  • Dark chocolate, melted
  • Marshmallows
  • Pink candles

Additional Items

  • Pink Candles
  • Toothpicks
  • Pastry brush
  • Piping Bags
  • Scissors

Directions

  1. Use your choice of plain store-bought or homemade donuts. If using homemade, ensure the donuts are completely cool before decorating. I used 8 homemade baked cake donuts in total.

  2. Melt the white chocolate. Dip the donuts in, and let them set

  3. To make the glaze, combine sugar, milk, and vanilla. Whisk until smooth. Add in blue gel food coloring until incorporated, then transfer into a piping bag. Snip a corner off. Then, pipe drips onto the donuts, smoothing the glaze out with a toothpick where needed. For the donut that is going on top, cover it completely with blue glaze.

  4. Use frosting or melted chocolate to secure the first donut onto the cake board or cutting board. Carefully stack the donuts.

  5. Combine yellow gel food coloring with vanilla frosting to create the yellow frosting. Add to a sturdy piping bag. Then, pipe on the yellow details on the top tier. You can use a dowel in the middle of the donut stack to hold them up if you wish.

6. To make the broomstick, use a long breadstick or pretzel stick and apply a layer of melted chocolate with a brush. When set, dip 1 end in melted chocolate and stick into a marshmallow on an angle so it’s leaning towards the donut tower. Stack another marshmallow underneath, attaching them together with melted chocolate.

 7. “Glue” the base of the marshmallow to the other side of the cake board with melted chocolate and wedge the “broomstick” between the top 2 donuts.

8. Combine more yellow gel food coloring with vanilla frosting to create a darker yellow frosting. Using this frosting, pipe long strands of icing onto the marshmallows to imitate the straw of the broom. Finish it off with a ring of piped dark chocolate approximately 3/4 of the way up.

9. Pipe small dollops of regular yellow frosting where the candles will go, then stick pink candles directly on top.

That’s it! This dessert would be a fantastic addition for a Disney birthday!

Recipe Credit: Family Disney

From our friends at chipandco.com
Filed Under: Disney & Co, Disney Food, Disney Snacks & Treats, News, disney baking, Disney Recipe, donut, sleeping beauty, Sleeping Beauty Donut Cake

Categories
Disney Food Disney Parks Disney Recipes Other

Walt Disney’s Chris’s Cold Pie Recipe

lemon pie

As the weather warms up for the summer months, we’re looking for the best desserts to take to family gatherings. Walt Disney loved a special lemon chiffon pie that his grandson, Christopher Disney Miller, was allowed to name. He called it “Chris’s Cold Pie”. Check out the recipe below if you’d like to enjoy this delicious treat at home!

Ingredients

  • 4 eggs, separated
  • 1⁄2 cup lemon juice
  • 1⁄2 cup water
  • 1 tbsp. unflavored gelatin
  • 1 cup sugar
  • 1⁄4 tsp. salt
  • 1 tbsp. grated lemon rind
  • 1 graham cracker crust (recipe on box)
  • Nutmeg

Directions

  1. In a small bowl, beat egg yolks with lemon juice and water just until combined.
  2. Mix gelatin, half the sugar and the salt in the top of a double boiler.
  3. Pour in egg yolk mixture, blending well.
  4. Cook, stirring constantly, over boiling water (water should not touch top section of double boiler) until gelatin dissolves and mixture thickens.
  5. Remove top from boiling water. Stir in lemon rind.
  6. Let set 20 minutes in a bowl filled with ice cubes, stirring occasionally.
  7. Remove from ice when mixture thickens enough to mound when dropped from a spoon.
  8. Meanwhile, beat egg whites (at room temperature) in a large bowl until soft peaks form when beater is raised.
  9. Gradually add remaining sugar, 2 tablespoons at a time, beating well after each addition.
  10. Continue beating until stiff peaks form when batter is raised.
  11. Gently fold gelatin mixture into egg whites just until combined.
  12. Turn into pie crust. Dust top with nutmeg and chill several hours. (If desired, omit nutmeg and serve topped with whipped cream.)

Have you tried Chris’s Cold Pie before? Let us know how you liked it!

Recipe from d23.

From our friends at chipandco.com
Filed Under: Disney Food, Disney Snacks & Treats, Other Disney Stuff, Chris’s Cold Pie, lemon pie, lemon pie recipe, Walt Disney

Categories
Disney Food Disney Movies Disney Recipes Other

Disney’s 101 Dalmatians Chocolate Chip Shake Recipe

101 Dalmatians Shake

Looking a fun Disney inspired dessert to make for a family movie night? Today, we’ll tell you how to make a frosty treat based on Disney’s 101 Dalmatians! The 101 Dalmatians Chocolate Chip Shake is simple to make. Below are the detailed steps:

Ingredients

  • 1/2 cup white chocolate chips
  • Red and blue sprinkles
  • 3-4 scoops chocolate chip ice cream
  • 3/4 cup milk
  • Whipped cream
  • Mini chocolate chips

Kitchen Items

  • Milkshake glasses
  • Blender
  • Polka-dot straws
  • Yellow paper
  • Scissors
  • Colored pencil or pen

Directions

  1. Put the white chocolate chips in a microwaveable bowl. Then microwave for 10 seconds at a time until it’s melted. We recommend stirring frequently to ensure it has consistency.

  2. Add the red and blue sprinkles into separate bowls and set aside.

  3. Next, dip top of milkshake glasses into melted white chocolate. Twist glasses to cover evenly, and allow excess chocolate to drip back into bowl.

  4. Quickly dip chocolate-covered milkshake glass into red or blue sprinkles to cover evenly.

  5. Put the milkshake glasses in freezer to set. Do so immediately after the last step.

  6. Place 3-4 scoops of ice cream into blender. Add milk and blend.

  7. Pour the shake into the glass. Add whipped cream and top with chocolate chips.

  8. To make the puppy name tag, cut out a circle from yellow paper and add your favorite Dalmatian pup name. Attach to glass under the sprinkles.

We hope you try this 101 Dalmatians Chocolate Chip Shake recipe at home for a fun treat when you watch 101 Dalmatians with your family!

Source: Family Disney 

From our friends at chipandco.com
Filed Under: Disney Food, Characters, Parks & Resorts, 101 Dalmatians, Disney Milkshake, Disney Recipe, Milk Shake